How to Fax Documents from Your iPhone
The world has transformed in various ways due to technological advancements. With the help of technology, you can now send documents, such as faxes, from your phone. In this article, you will learn how to fax documents from your iPhone with ease.
Nowadays, you can send faxes directly from your iPhone. It is a convenient way for those who don’t have access to a scanner or a fax machine. All you need is an internet connection and a compatible fax app.
What You Need to Fax Documents from Your iPhone
Faxing documents with your iPhone can save you time and effort when you need to get an important document to its recipient quickly. To fax documents from your iPhone, you’ll need the right equipment and applications. Here’s a quick guide to what you’ll need for successful iPhone document faxing:
- An iPhone with access to the internet
- A dedicated mobile faxing app
- For some apps, a monthly faxing subscription plan
Having the right equipment and apps is essential if you want to use your iPhone to fax documents. Most traditional fax machines and services cannot be connected to your iPhone, so you’ll require a dedicated app to get the job done.
Although there are many free apps available for faxing, most require a monthly subscription plan. The fees can vary, so be sure to compare different apps and select one that best fits your needs.
Steps to Fax Documents from Your iPhone
In today’s digital world, faxing documents from your phone no longer requires a dedicated fax machine. You can use an app to send a fax directly from your iPhone. Here are the steps to take to fax documents on your iPhone.
Step 1: Install a Fax App
The first step to faxing documents from your iPhone is to download a fax app. There are a variety of apps available, like eFax and CocoFax, that will allow you to send and receive faxes on your iPhone. Look for an app that works well with your device and offers the features you need.
Step 2: Create an Account
Once you have installed a fax app, you will need to create an account. Enter the information required by the app and read through the terms and conditions. Make sure you understand any charges associated with using the app before you agree to the terms of service.
Step 3: Prepare Your Document
Before you send a fax, you need to make sure that your document is in the proper format. Most apps will accept a variety of file formats, including PDFs, Microsoft Word documents, images, and more. The app may also provide tools to help you add markings, signatures, and other effects to your document.
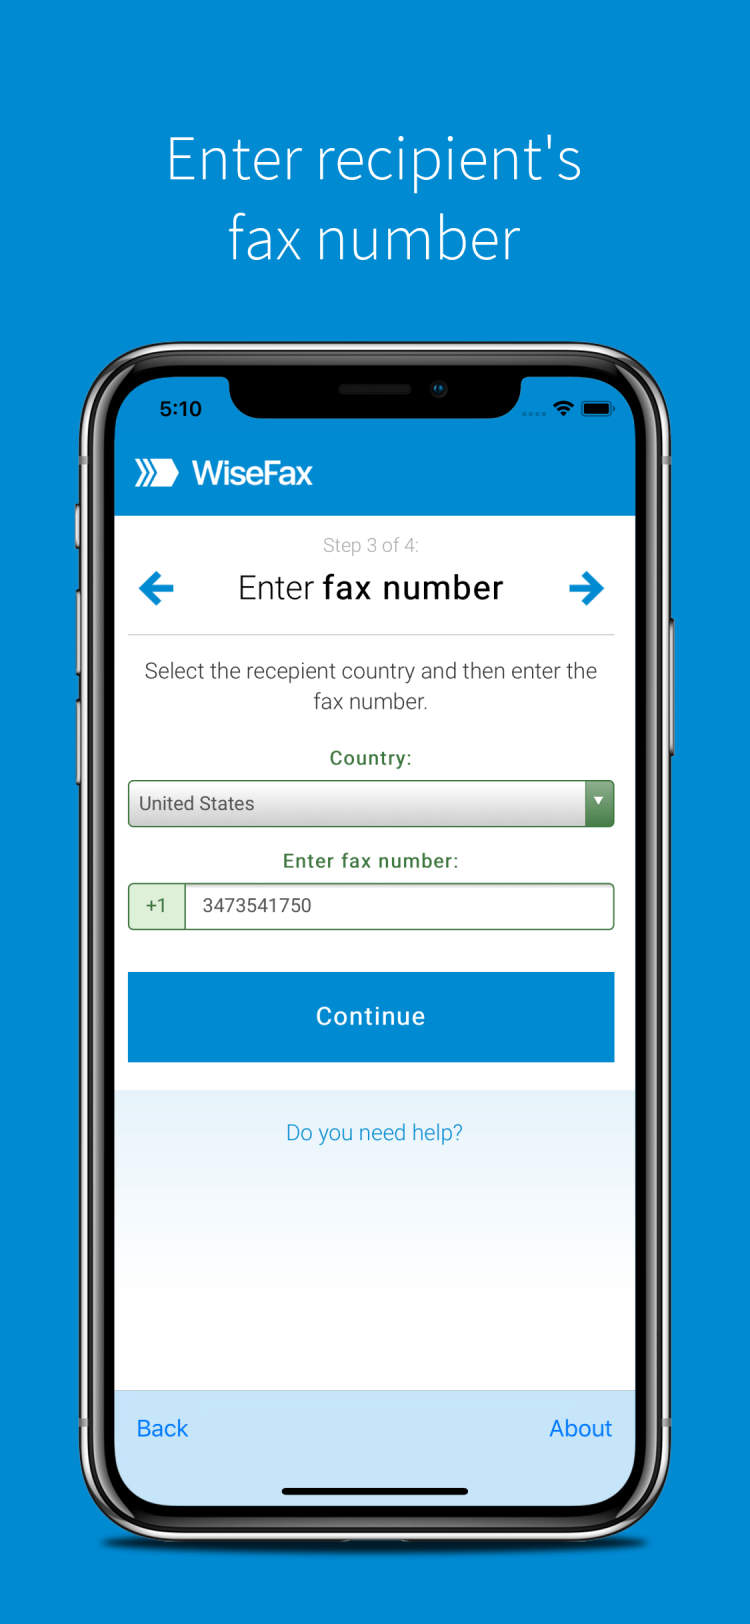
Step 4: Enter the Recipient Information
To fax the document, you need to enter the recipient’s information. Enter their fax number, any notes, and your contact information into the app. Make sure you double check all of the details before sending the fax.
Step 5: Send the Fax
Once you have verified all of the information is correct, you can send the fax. Make sure your device is connected to wifi and has a strong signal before you hit the send button. Once your document has been sent successfully, you will be given a confirmation number.
Step 6: Follow Up
Faxing involves sending information over the phone, so it’s possible that the fax was not received. If you don’t get a confirmation back from the recipient within a few days, you may want to follow up to make sure they got the fax. You can also use the app to check the status of your fax.
Precautions When Faxing Documents from Your iPhone
Faxing documents from an iPhone can be a convenient way to save time and streamline workflows. However, there are a few precautions you should take to ensure that your documents are securely transmitted and accurately received.
Before sending any documents via fax, it’s important to make sure they are correctly formatted. This means checking that any text or images are visible, and that the document is legible. Additionally, it’s best practice to double-check the fax number you are about to send to, as this can save you the hassle of having to request the recipient to resend the document.
Once your document is ready to be sent, there are a few additional precautions you should consider:
- Only send documents to trusted recipients.
- Choose an app or service with additional security features, such as encryption or password protection.
- Look for a service that offers a copy of the sent fax as proof of receipt.
- If sending sensitive documents, you should always encrypt them with a password.
By taking these precautions, you can be sure that your documents are securely transmitted and accurately received. Additionally, this can help you ensure your privacy and protect your sensitive information.
Conclusion
In conclusion, it is possible to fax documents from your iPhone if you have a third-party app to help you. These apps are usually inexpensive and are very easy to set up and use. Once you are set up, you will be able to fax documents quickly from your iPhone whenever and wherever you want. As the technology continues to improve, it may become even easier and faster to send documents using your iPhone.
Faxing is still a reliable way to share documents and is essential to many businesses. With the convenience of being able to do it from your iPhone, it has become even more convenient and efficient. Whatever the reason you need to send a fax, with technology like this, you no longer have to be tied to the office in order to accomplish it.
Post a Comment for "How to Fax Documents from Your iPhone"